Fix Mass effect headmesh uv mapping after importing in Blender 2.6/2.7
Following my previous post about the Mass Effect headmorph importer for blender, I’ve been asked how the whole thing worked with the uvs.
So here is explained how I proceed to texture my Shepards (or any imported Mass Effect character) in blender 2.6x or 2.7x. If you’re using Blender 2.8x or 2.9x with Befzz psk importer addon, good news for you: you don’t need to go all that trouble as everything is already working as expected after importing.
For people still stuck with previous versions of blender, here we go:
1/ First step is of course import of the head : I always use the psk importer provided with blender by default. It works great with Mass Effect psk. (I never managed to import psa though, so if anyone has tips about it…).
If you went there after following all the steps described in Mass Effect headmorph importer for blender, you should have your Shepard head ready for texturing.
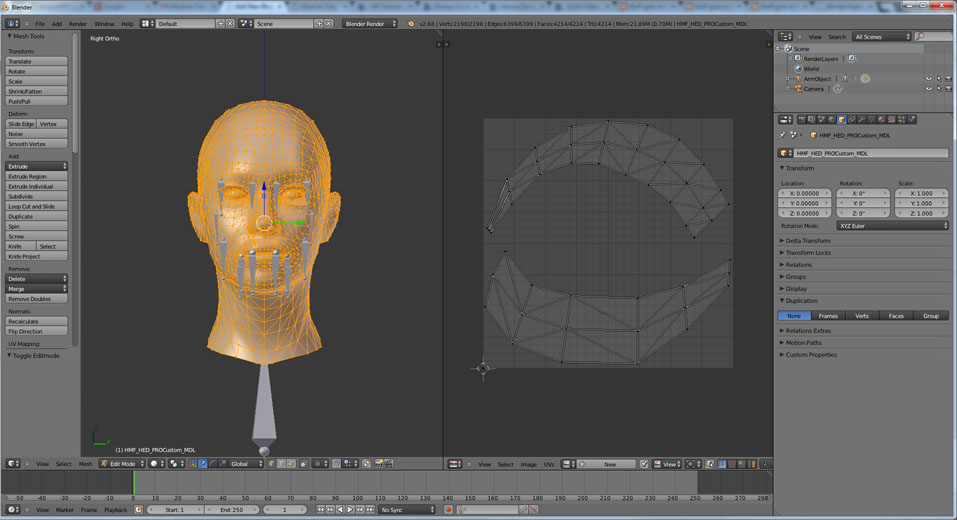
2/ Setup your blender to have a panel showing the UV/Image Editor, for example as shown below:

3/ Select the head and switch to Edit mode (TAB). You should see the UV of the eyelashes appear in the UV/Image Editor :

4/ Unselect all vertices (press A) and click on the materials button in the properties tab to display the materials. We have 4 materials here, corresponding to face, scalp, eyelashes and eyes. The problem at this point is that all vertices of the mesh are assigned to the material in the first slot, and no vertice is assigned to the other slots. What we’re going to do is fix that and reassign the right parts of the mesh to a material.

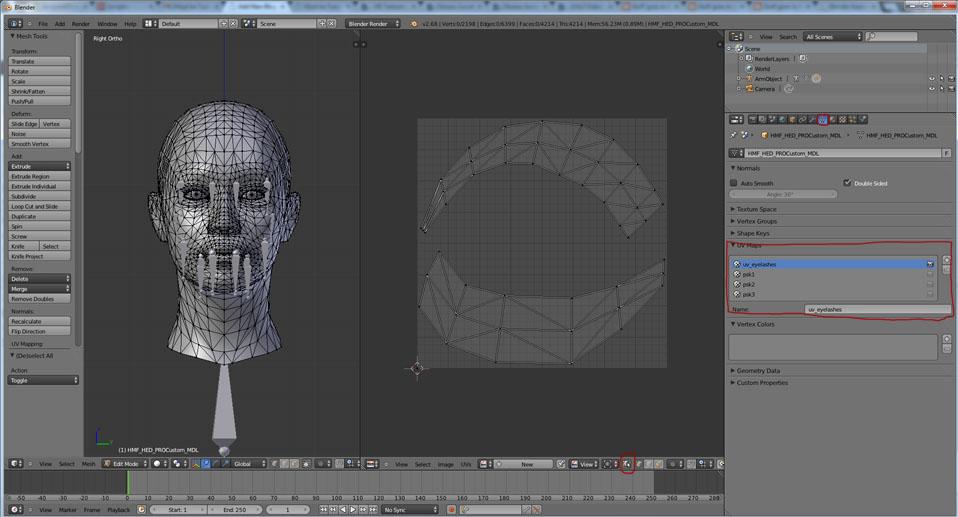
5/ To do this, click on the data button (on the left of the material button) to display the panel where we can find vertex groups, shape keys and more importantly for us, the UV maps. Our headmesh have four UV maps, named psk0 to psk3. Select psk0 and then in UV/Editor panel, click on button ‘Keep UV and edit mode selection in sync’. You will see the eyelashes uv map appear again in Image Editor.
Since psk0 is the eyelashes, you should rename the uvmaps to something telling like for example uv_eyelashes.

6/ Now in the Image Editor, select all vertices of the eyelashes (using the circle selector by pressing C for example) : you will see the eyelashes being selected at the same time in the 3D view.

7/ Now, with the eyelashes still selected, switch back to materials panel. In the Materials list, select pskmat0 and click assign. Rename pskmat0 to something telling like mat_eyelashes.

8/ Go back to data panel. Unselect everything (press A). In the UV maps list, select psk1. You will see the scalp appear in the Image Editor. Redo exactly what we just did for psk0 : rename psk1 to uv_scalp, select all vertices in Image Editor, switch to Material panel, rename pskmat1 and click assign.


9/ Do the same thing for psk2 (eye) and psk3 (face).


And you’re finally done!
We have successfully map the different parts of the mesh to the materials. Now, you can go ahead and play with blender or cycles materials to texture your Shepard!
Hope this will be helpful. Feel free to contact me if you have any question.