Mass effect headmorph importer for blender
Recently, I’ve been quite obsessed with Mass Effect. It of course started by playing the 3 games (several times), then by reading some fanfics (found some good ones recently), starting writing some myself, though nothing I’ve finished for now, then I looked for fanarts and I’ve finally commited some myself.
While looking for information about the latter subject, I stumbled upon this excellent post by Nhaneh on tumblr who explains how to import your own Shepard (the one you took forevever to customize at the beginning of the game, not the bland default Shepard) into 3dsmax and provides a script to do so.
Thrilled with this discovery, I’ve downloaded 3ds max trial to give the script a try and was very happy to see it works like a charm. But after the initial pleasure coming with this finding came the frustration : this script is for 3ds max and I certainly do not intend to give up Blender just for this.
So, I thought that probably someone somewhere must already have ported the script for Blender, but unfortunately, if this is the case, I didn’t find it. So, I decided to just do it myself.
And that’s where you might start being interested by my rantings : the script is done and looks to work quite nicely.
So hereafter, you’ll find a little tutorial to follow to import your own Shepard to Blender. It supposes that you already know how to extract the game’s assets with umodel from Gildor.
So, beside Blender, you will need the following things:
– Gibbed save game editor that you can find here.
– The script I’m talking about that you can download below for blender v2.7x (last tested in blender 2.70a) and blender 2.8x (tested in blender 2.91.2):
The first thing to do is to export your Shepard headmorph with Gibbed Editor.
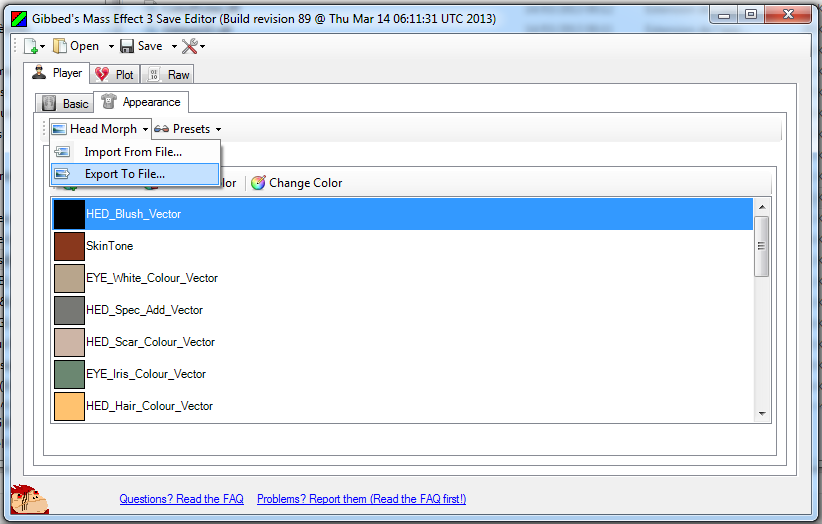
First, open Gibbed.MassEffect3.SaveEdit.exe and load a save from the Shepard you wish to import by clicking open.
Then, go to tab Player/Appearance, then click headmorph/export to file :
This way, you get a .me3headmorph file (or a .me2headmorph if you’re using Gibbed Editor for Mass Effect 2 and a Mass Effect 2 save).
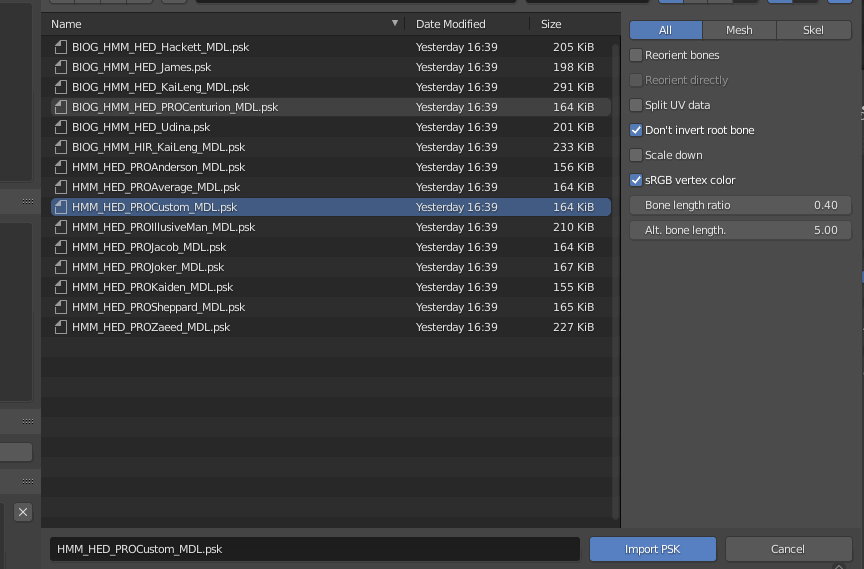
Now, open blender and import the psk file of custom shepard you need (note that if you’re using blender 2.9x, you will need the new version of the psk importer by Befzz that you can find on Github )
– For Femshep, this psk is “HMF_HED_PROCustom_MDL.psk” and can be found in “BIOG_HMF_HED_PROMorph_R/Custom”
– For BroShep, it’s “HMM_HED_PROCustom_MDL.psk” in “BIOG_HMM_HED_PROMorph_R\Custom”
WARNING : in blender 2.9x with Befzz psk addon, you MUST uncheck the scale down option at import for the script to work :
If you don’t have these PSK files at your disposal yet, you need to extract them from the game’s files with umodel from Gildor, you will find all necessary information to do that on his website here.
Once the psk is imported, you should have something like that in Blender :

WARNING: the script uses the world related coordinates of the bones, so it is very important that you don’t move or resize the result of the import.
Now, you need to install the headmorph importer script in Blender (the one you downloaded at the beginning). The downloaded file is a zip file which contains only one python file : this file must be unzipped to the script/addons directory of your Blender installation.
Then, go to File/User Preferences/Addons/Animation and activate the ‘ME2 and ME3 face importer‘ script. It will add a new panel in the Object panel of the properties :
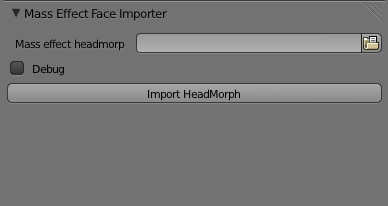
Click on the file browser and select the .me3headmorph file exported at the beginning.
The Debug checkbox is only there to add some logs in case of problem, so you can leave it unchecked right now.
With the Custom Shepard mesh selected, click on Import HeadMorph.
After a second or two, you should see default custom Shepard transform into your own Shepard and you’re done!
A quick example of the result with one of my Sheps :
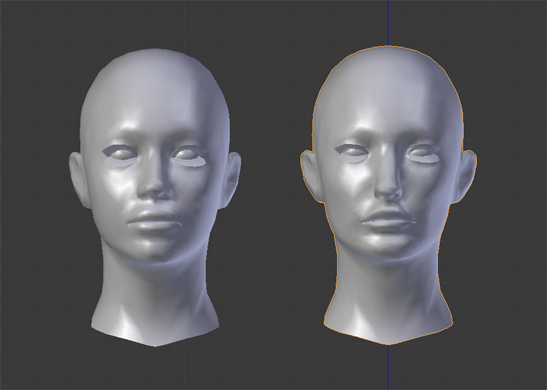
On the left, we have the custom FemShep mesh as is after import and on the right the same mesh after use of the script..
You can see more telling examples with two of my shepards in this post
Don’t hesitate to post a message/a comment if something doesn’t look clear to you in the step by step.
Have fun!
[Edit 17/10/2013] I’ve been asked about uv mapping of the head and how to fix it, since it’s a little messed up after the psk import : you can find here another post about how to fix the uv mapping.
[Edit 23/02/2021] Update for blender 2.9x